November 29, 2013

Thanksgiving Weekend!

Happy Black Friday, readers! I hope you had a super special holiday with your loved ones! Tell me about your day!

This weekend is my nephew's first birthday so I'm quite busy! I'm hoping to have a blog post up to start December off right! I'll be back Sunday. Enjoy your weekend! I love you all!

xo K

November 26, 2013

"Bruder bought a coconut, he bought it for a dime."

"You put the lime in the coconut and drink 'em bot' up!" No really, drink 'em up. Coconut oil is the topic of the day here at the Cupcake Blondie! Tell me, have you ever used it in a recipe as a substitute for vegetable oil? How about in your hot tea when you've got a sore throat? If you didn't know already, coconut oil is edible and can help with your health in oh so many ways. But today we're going to look at the beauty benefits of this wonder oil!

Take a look at your vanity or your bathroom closet, wherever it is that you store your beauty products. Do you have multiple lotions, facial moisturizers, or face cleansers? And take a look in that shower of yours. How many shampoo bottles, conditioning treatments, and shave creams do you keep in there? You can technically fulfill all of these and more with one bottle of coconut oil. That's right! I recently discovered that a lot my friends are buying this stuff and using it for their skin. Come to find out, it has a plethora purposes!


Primary Beauty Uses:

  • Makeup remover - cuts through waterproof mascara and liner like no one's business!
  • Prevent stretch marks during pregnancy - this is an awesome alternative to cocoa butter!
  • Kills yeast infections topically - and it's way cheaper than those kits we have to buy.
  • Intensive nighttime moisturizer - more cost effective than expensive creams.
  • Sugar scrub - mix equal parts coconut oil and brown sugar.
  • Natural chap stick - bonus jonas it has a natural coconut taste!
  • Shave gel and after shave - it's super slick so your razor won't tug and it will sooth skin afterwards.
  • Destroys cellulite - with continuous use you'll rid that cellulite in no time!
  • Treat and diminish acne - it will dry out the pimple but not your skin, and it's naturally anti-fungal!
  • Stimulate hair growth - when used as a conditioning treatment.
  • Removes frizz associated with split ends - seals the cuticle to reduce the frizzle-frazzle.
  • Soften cuticles - and strengthen nails at the same time!
  • Alleviate flaky skin on elbows - perfect timing with the weather change upon us!
  • Coconut body balm - whip it with shea butter with a hand mixer and slather yourself up!
  • Subtle highlighter - it's moisturizing properties add a sheen to your high cheekbone when applied sparingly.
  • Deep conditioner - apply a quarter sized amount to your hair, cover with a shower cap and leave on for a few hours, shampoo and rinse.


How does it work exactly? The fatty acids in the coconut oil naturally and safely soften hair and skin. Since it acts as a conditioner it detangles the worst knots, hydrates to the core, fights frizz by sealing the ends, and repairs dry and/or damaged hair. As a hair conditioner you'll want to warm it in your hands then apply the oil from the root to the ends to fully concentrate the oil on your hair. Some people will simply rinse it off but if you aren't used to or don't like the feeling it may leave, you can certainly shampoo it out. I have my father's hair and my roots get greasy fast so I would shampoo myself.

Because it is an oil it slides makeup right off your face; try a water-based cleanser and an oil-based cleanser on your full face of makeup and you will see that oil-based cleansers get your heavy duty makeup off faster and more efficiently than water-based. The oil breaks the makeup down and in turn it is easier to remove.

I've attached some links below of some brands that are on the market. I have also heard you can find it at bulk grocery stores in large gallon tubs. I'm going to snag a smaller jar first to try out how I want to use it! What about you? If you already use this, where do you buy and how do you use it? Leave it in the comments! Thanks for reading!

Spectrum Naturals: Organic Coconut Oil
Nature's Way: Organic Coconut Oil
Nutiva: Organic Coconut Oil

xo K

November 24, 2013

Current Favorites as of November 2013

LIP PRODUCT: Wet n Wild "Bare It All" Matte Lipstick
MASCARA: NYC Instant Lash
CONCEALER: Essence Match 2 Cover
SHADOW: Sedona Lace 28 Warm Palette and e.l.f. Mineral Shadow in "Angelic"
LINER: Wet n Wild Coloricon Eyeliner in "Black Black"
BLUSH: NYX Blush in "Pinched"
HAIR PRODUCT: Biolage Hydratherapie Ultra-Hydrating Balm


My favorite color this season is my nude lipstick from Wet n Wild. I reach for the shade "Bare It All" almost daily unless I'm doing something really funky or bold. It is a perfect nude color that isn't too pink nor too brown. It can be paired under a pretty gloss, too, to add a little touch of color if you want it a little pinker. At only $1.99 at KMart it's totally worth it!


This next mascara might seem simple, but sometimes that's all you want when you have a bold and bright shadow color. The NYC Instant Lash mascara has the perfect basic brush and separates every lash. Mine dried out a but though after a month but at only a buck a pop it's so worth it! It lengthens and separates my lashes and makes them feathery and wispy. If you're looking for definition and length this is worth a try!


As you've noticed, I am really diggin' my Essence Match 2 Cover concealer! The right side is a lighter tone and it matches my skin perfectly! It also adds a little bit of light to my under eyes when I conceal my little veins. It's purpose is to give you two tones that you can customize together to match your perfect shade. I'm happy I don't have to do any guess work since one side is perfect for my skin tone! I picked mine up from Ulta in store but it's also available online for $3.49!


I have been reaching for my Sedona Lace warm palette every time I do a day-to-day look. If I'm using browns, I always use this palette. I may only use one color or I might do the entire look with the palette, but either way I'm in love with it! It has the most perfect shades of browns and neutrals for any look! The pigmentation on the shimmer shadows is so silky! The matte ones not so much - they can be powdery and some of the lighter shades aren't too pigmented. But overall as a palette for everyday it is amazing! I got mine when they had a 40% sale on the Sedona Lace website. It is presently out of stock, but check back!


Also on my favorites list for eyeshadows is the e.l.f. Mineral Shadow in Angelic. It is so snowy with a silvery glow! It is my go to for anything wintery this month! At only $3.00 you will absolutely get more bang for your buck! It's the perfect inner corner, all over lid, and bold highlight for the icy tutorials I'm planning this December. And if applied lightly it adds the just right amount of shimmer to a matte shade. They have 26 shades available on their website!


It's only a dollar but it does better than my more expensive liners! The Wet n Wild Coloricon eyeliner is the best pencil liner you'll ever find! No tugging and pulling on your delicate eye area. It's super pigmented! And it's so soft and buttery. It applies super smoothly, too. I love using it for dark black smudged liner. Any color is amazing though! I have a lipliner as well that is the same formula. Sometimes you will need to hunt down Wet n Wild but you should find it in 99% of your retailers (one of the Walmarts near me does NOT carry the brand but the other two do). You can always find it online when in doubt!


NYX has been impressing me with every product I've tried so far, and I've tried a lot! I found this NYX blush on Amazon on sale and I love it! It has just a TINY amount of shimmer in it so it isn't overpowering. It's also a build-able blush. If you apply it lightly you get a subtle flush of color. But if you choose to build it up you can get a rich deep pink look, too! I also love the packaging - the studded look is just edgy and I totally dig it. 

(Yes, that is the same blush - I just built the color up to change the intensity.)

I have been waiting for this time of year for the amazing packaged bundles of hair care products! I have a stylist friend who was so kind to go into our local Salon Centric and pick up both the 32 oz. giant bottle of shampoo and this 16.9 oz. balm for $15! Thanks, Lauren! The Biolage Hydratherapie Ultra-Hydrating Balm is so amazing for every hair type! It hydrates, repairs, softens... perfect! You can find it at drugstores for a pretty penny but if you have a salon friend who can go into those cosmetologist-only shops they have amazing deals! Also, check your hair salons in the mall and shopping plazas because they also have awesome Christmas package deals on Biolage! At any rate, if you end up paying the full retail for it you are still getting exactly what you pay for! This is my all time favorite line of hair care to tend to my bleached locks!


What did you recently fall in love with this month, see what I did there? I want to hear it in the comments! Don't forget, I'm on Facebook! Check it out and "like" the page! I'm going to be doing a giveaway when I get a certain number of blog followers and Facebook likes! Thanks for reading!

xo K

November 22, 2013

Tutorial: Arctic Eyes

Winter is approaching fast for some of us and that means frosty looks! I'm so excited to share this ice blue eye look with you! I lost some "footage" if-you-will between uploading the photos from camera to laptop so you'll have to bare with why my lip routine isn't on here. I would love to see your recreations of this arctic eye in the comments! (Products listed at the end.)

Don't forget, I'm on Facebook! Click the Facebook button at the top of the blog to go straight to the page and "like" it to stay in touch with me. All of my social media links are available in the header. Thanks for stopping by! I love you all! xo


So fresh and so clean clean! Just did my hair and I'm ready for some icy makeup to bring on this winter!


I took the Essence I Heart Stage shadow base and primed my lids. I also used an e.l.f. cream shadow as a base in my crease where I will later apply a deep blue - since the cream shadow is a dark coordinating blue, it will make the crease color pop! In my case, I actually came back with that cream shadow for my crease color.


Using this ice blue from my Sedona Lace 88 Matte palette I applied it to the outer two-thirds of my lid.


Make sure to use a flat shader brush so your pigmentation is bold. As you can see, I left my inner corner area naked so I can apply a frosty pigment to really amplify the winter theme.


Using a silvery white mineral pigment I applied it heavily to my inner corner and then lightly to my brow bone. As you can see, the pigment looks just like snow!


The iciness is really taking effect now!


Using SHATTERED from my Urban Decay Ammo palette I applied it to the crease and blended it into the light icy blue on the lid to add depth.


And now for the cream shadow again! It's a deeper blue but still pearly so it works with this look. (Yes, this is a photo from earlier on but at least you get to see the cream shadow.)


I applied it with a small shader brush so I could control if I wanted it thick or thin in the crease. Make sure to  really blend this in with a dense blending brush once it's applied to keep it from creasing. You'll want to "seal" it with a coordinating color as well to help prevent creasing during the day.


I took the silvery-white pigment and applied it on my bottom lashes in the inner corner and took the Shattered shadow from the Ammo palette and worked it in on the remainder of my lower lashes.


My FAVORITE black cream liner and a small angled brush! (You've seen this before so I skipped this step in the photos.) I didn't wing it this time as I wanted the color and the false lashes to be the focus.


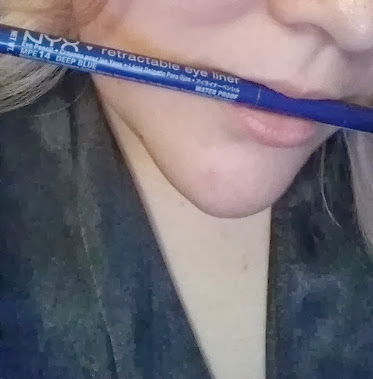
I only lined my top lid with the black liner. I chose to use this retractable navy liner for my bottom lashline to smoke out the look and add more color. We're going for a blustery winter look so I thought it would be appropriate to add some more blue!


These are the eyes with all of their color! I love how deep it looks around the lashes! Don't forget those brows! I used a clear brow gel just to tame them a bit.


I picked up these lashes at ROSS for only $2.99 and thought they would add just the right amount of drama to this bold look! Don't you agree? :) I used the bottom pair - it doesn't look like it here but they are softer in the center and get longer and thicker towards the outer corner.


I used a basic lengthening mascara for my top lashes to darken them so they don't stand out under the falsies. Unfortunately, the application of the falsies were some of the photos that were lost! I will absolutely take photos again next time and make SURE they're in here! :P


After the falsies, I used the same lengthening mascara on my bottom lashes and applied my concealer. I have no idea why I love this concealer SO much but it's just the perfect shade for me. And it's so affordable! Okay so maybe that's why I love it so much! This little pot goes a long way - I use it every time I wear makeup and yet it still looks brand new. 10 points to Gryffindor Essence cosmetics!


For this look I wanted a soft pink cheek so I used NYX Pinched blush and applied it lightly to the apples of my cheeks.


I lined my lips with Rimmel London's Exaggerate liner in Eastend Snob (my favorite neutral pink liner) and applied a nude lipstick on top. Finished the lip off with NYX Butter Gloss in Vanilla Cream Pie and...


PA-POW!
FINISHED LOOK! I am obsessed with this look for December!


Essence I Heart Stage Shadow Base
e.l.f. Cream Shadow in Teal Party
Sedona Lace 88 Matte Palette
e.l.f. Mineral Loose Eyeshadow in Angelic
Shattered from the Urban Decay Ammo Palette
e.l.f. Cream Liner in Black
NYX retractable liner in Deep Blue
NYC Instant Lash in Black
Generic False Eyelashes
Essence Match 2 Cover Concealer
NYX Blush in Pinched
Naked Illuminated Highlight
Rimmel London's Exaggerate liner in Eastend Snob
Wet n Wild Bare It All Lipstick
NYX Butter Gloss in Vanilla Cream Pie


Please please please recreate this and show me the photos! I want to see them! Thanks for reading! Until next time...

xo K

Tutorial: Crimson and Gold

I sat down at my desk, chatting with a near and dear friend and said, "What should I do?" Little Miss Marah gave me this idea for Christmas! I tweaked her silver & gold idea and chose to do a crimson & gold since it's both a fall and winter appropriate combo. So thanks for the idea, Marah! Let me know if you will be rockin' a red and gold scheme this winter for any parties! I think I might even intensify this look later in the month, but you'll just have to stick around and see. ;)

And on a related note, December is the month of tutorials! I will be doing a special series specifically for "the most wonderful time of the year" preparing you for all the holiday parties ahead! Please stay tuned - I have a LOT in store! xo


As always, start with a clean, moisturized canvas!


Prime your lids with your favorite eyeshadow base.


Highlight under your brow and inner corner with a light matte shade.


Use a gold color shadow for all over your base and partially in the crease. I used the shimmery color in the top corner. It's a deeper gold instead of a true yellow gold.


Here are the eyes all based with the gold shimmer shadow!


Choose a deep crimson color for your crease. For this look I chose a burgandy color to make it sultry instead of bright an cheery.


Use a blending brush to apply the color heavily in the crease. With mine I had to build it about four times to get it as pigmented as I wanted. With my Real Techniques eyeliner brush I swept the gold and red under my lashes.


I know it looks brown here, but it's very red, I promise!


Take a rust loose pigment and apply this to your crease as well to brighten it up a tad bit more. I LOVE how this NYX pigment took the look to the next level. (You'll see.)


I tried a coordinating coppery color first for my liner but it just blended right in so I chose a liquid brown liner to apply to the top lashes and a dark brown pencil liner to the bottom waterline. I didn't smoke out the bottom as I wanted you to see the gold and red shadow.


I found it! I lost my curler for the last three weeks and upon cleaning this pig sty I live in I found it! So... curl your lashes and prep them for your mascara!


I fought and fought but decided I didn't want to apply falsies to distract from the colors. Au natural it is!


Use a thickening mascara to coat your lashes!


I concealed under my eyes and my few blemishes on my jawline.


I didn't want too pink, too coral, too orange of a blush but didn't have any mauves or deep reds so I chose a light pink with shimmer for the apples of my cheeks.


I also used the Urban Decay Naked Illuminated for my cheek highlight. BLEND IT OUT!


WARDROBE CHANGE - wanted black for the final photos! Taking a medium red tone liner I lined my lips to give my lipstick a base.


Using a cherry red color, I applied it to my lips. I wanted the cherry red to bring out the red in my eyes.


And before you know it, you're done!


PRODUCTS USED:
Essence I Heart Stage Eye Primer
e.l.f. 32 Warm PaletteULTA Single Shadow in Firework
NYX Ultra Pearl Powder in Rust PearlWet n Wild Mega Liner Liquid Liner in Dark Brown
NYX Slide On Glide On Liner in Brown Perfection
Essence Clear Brow Gel
Jordana Best Lash Extreme in Black
Essence Match 2 Cover Concealer
e.l.f. Translucent Matifying Powder
e.l.f. Studio Blush in Twinkle Pink
Urban Decay Naked Illuminated
e.l.f. Lip Exfoliator
Jordana Kohl Kajal Lipliner in Brunt Cherry
Wet n Wild Lipstick in Cherry Picking
e.l.f. Luscious Liquid Lipstick in Strawberry (not shown, I decided I wanted a little gloss)


I hope you enjoyed! And the black robe you see in my tutorials is from Fredrick's of Hollywood. I tend to always wear it out of the shower when I'm doing my makeup so it appears a LOT in photos. Lots of love!

xo K